
Why Soldering Tips Oxidize and Turn Black — and When to Replace Them
A production supervisor sends over a photo: twelve tips lined up on a bench, every one of them black. The question is always the same — can we save these?
The honest answer is that nobody can tell from a photo. But you can tell in about five seconds at the bench, and the test is not the one most operators use.
This guide covers what the black layer actually is, why it forms, how to separate a recoverable tip from a dead one, and what to change so you stop buying replacements every month.
What the Black Layer Actually Is
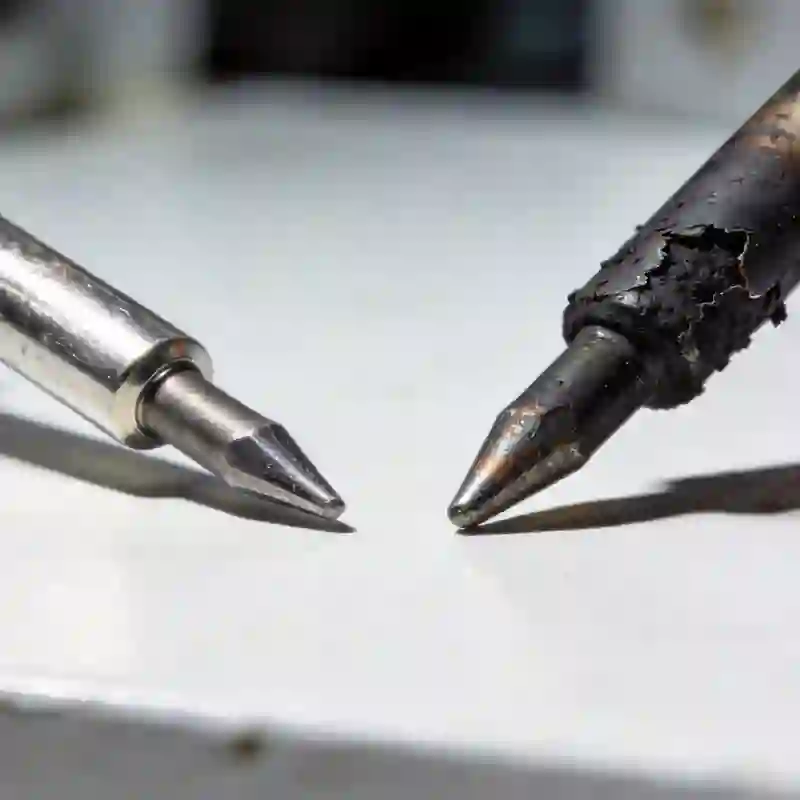
A black tip is not one problem. Three different failure modes look almost identical at a glance, and only two of them are recoverable.
1. Flux residue and burnt organics.
Brown to black, sits on top of the surface, soft enough to scratch with a fingernail. It comes off with brass wool or a dry cloth. This is cosmetic — the tip underneath is fine.
2. Iron oxide.
Dull grey-black, tightly bonded, does not wipe off. The iron layer is still intact underneath; it has simply reacted with oxygen at temperature. This is recoverable, and it is where most “dead” tips actually sit.
3. Breached iron layer.
A pit, a crater, or a patch of copper colour showing through. This is not oxidation. The protective iron has worn through and the copper core is now exposed to molten solder, which dissolves copper quickly. There is no cleaner, tinner, or activator that fixes this. The tip is finished.
The distinction matters because the workshop default — scrub it, dip it in activator, keep going — works for case 2 and does nothing for case 3. Worse, scrubbing a breached tip with abrasive removes more iron and speeds up the failure.
Why Tips Oxidize in the First Place
Iron oxidizes when it is hot and exposed to oxygen. Inside a soldering iron, four conditions make that happen faster than it should.
Temperature above the working range
Oxidation rate roughly doubles for every 20 °C above the minimum temperature needed for the joint. A tip run at 400 °C when the joint only needs 330 °C is oxidizing at several times the necessary rate — and above roughly 400 °C the iron layer also starts to lose material, not just discolour.
Working temperatures that actually get the job done:
| Alloy | Working temperature | Standby |
|---|---|---|
| Sn63Pb37 (leaded) | 280–320 °C | 250 °C |
| SAC305 (lead-free) | 320–350 °C | 280 °C |
| SAC305 on heavy ground plane | 360–380 °C, short bursts | 300 °C |
| High-temperature alloys | 380–400 °C | — |
A simple check: if the joint flows in under two seconds, the temperature is right. If it takes longer, raise 10 °C — but bring it back down when the board changes.
Idle time at temperature (dry burn)
A tip sitting hot with no solder on it oxidizes continuously. Thirty minutes of idle time at 380 °C does more damage than eight hours of actual soldering, because during soldering the solder layer shields the iron from air.
This is the single most common cause we see in factories that report “tips don’t last like they used to”. The tips are not defective. The stations are sitting hot between boards.
Flux chemistry
All flux reacts with hot iron; some reacts much faster.
- No-clean flux — least aggressive, leaves a protective residue
- Rosin (RMA) — mild, traditional, forgiving
- Water-soluble / organic acid flux — removes oxide very effectively and attacks iron aggressively at temperature. If you use it, clean and re-tin immediately, not at end of shift.
Cleaning method
- Brass wool — abrasive enough to remove oxide, not hard enough to cut iron. Correct choice.
- Wet sponge — thermal shock. The iron layer micro-cracks, and oxidation then starts inside the cracks where you cannot see it. Acceptable on ceramic-coated tips, poor choice on bare iron.
- Sandpaper, files, emery cloth — removes the iron layer directly. There is no situation where this is correct.
The Five-Second Test: Recoverable or Dead?
This is the part most guides skip. It takes five seconds per tip and it separates the twelve black tips on that bench into two piles.
Step 1. Set the iron to your normal working temperature (350 °C if you are not sure).
Step 2. Clean on brass wool — three or four light strokes, no pressure.
Step 3. Apply fresh solder to the working face.
Step 4. Count to five.
| What you see | Diagnosis | Action |
|---|---|---|
| Solder spreads into a thin, bright, even film | Surface contamination only | Keep using |
| Solder beads first, then wets after 5–10 s | Light iron oxide | Clean, re-tin, use activator sparingly |
| Solder forms a ball and rolls off, no wetting | Heavy oxide or damaged iron | Replace |
| Pit, crater, or copper colour visible | Iron layer breached | Replace immediately |
Run this at the start of every shift, on every tip in use. Twenty seconds per station. It catches failure before it becomes a cold joint that ships.
One note on the “rolls off” result: if the solder balls up but the tip is visibly intact with no copper showing, it is worth one attempt with a proper tip activator before scrapping. If it still will not wet after that, the iron surface is gone.
What Actually Works to Recover an Oxidized Tip
For cases 1 and 2 — contamination and oxide — these four things work, in this order.
Brass wool first. 0.5 mm brass shavings remove oxide mechanically without cutting into iron. Replace the wool when it turns dark grey; loaded wool just smears residue around.
Tip activator, used sparingly. Ammonium chloride based tinners work, and they work fast. But they are salts, and salt plus heat plus iron is a corrosion recipe. Use once to recover a tip, not as daily maintenance. A tip that needs activator every shift is telling you something about temperature or idle time.
Re-tin immediately after cleaning. The solder layer is the protection. A clean, dry tip re-oxidizes in minutes at working temperature. Get solder on it before you put it back in the stand.
Lower the temperature when idle. 250 °C standby, or enable sleep mode. This alone typically extends tip life by 30–50 % in production environments.
What does not work, despite being common practice:
- Sandpaper, files, emery cloth — removes iron
- Saliva, cloth, leather, bread crust — workshop folklore, no effect on oxide
- Vinegar or citric acid — dissolves iron slowly, makes the next failure worse
- Running the iron at maximum to “burn off” the black — accelerates exactly the process you are trying to reverse
Five Signs the Tip Is Finished
Replace, do not recover, when any of these is true:
- 1. Copper colour visible anywhere on the working face
- 2. A pit or crater you can feel with a fingernail
- 3. Partial wetting — solder covers a ring, a stripe, or one spot instead of the whole face
- 4. Deformation — the edge is eroded, bent, or no longer holds its shape
- 5. Lost thermal mass — the tip can no longer hold temperature under load
At that point the arithmetic is simple: a replacement tip costs less than one reworked board.
Prevention: What Actually Extends Tip Life
- Tin before shutdown, not after. A tip stored tinned comes back clean.
- Sleep mode at 250 °C after five minutes idle. Most modern stations have it. Turn it on.
- Brass wool daily, wet sponge rarely. If you must use a sponge, use distilled water and a ceramic-coated tip.
- Match tip geometry to the joint. A 1 mm conical tip on a large thermal pad means long dwell time, which means more heat exposure and faster wear. Using the right geometry reduces both soldering time and tip temperature.
- Store tinned, never dry.
When Black Tips Keep Coming Back
If one station burns through tips in weeks while identical stations last months, the tip is usually not the variable. Check, in this order:
- 1. Temperature setting vs. joint requirement — is the station set high “to be safe”?
- 2. Operator habit — dry wiping, no re-tin, tips left hot between boards
- 3. Flux type and application — water-soluble flux used without immediate cleaning
- 4. What you are actually buying — iron layer thickness varies enormously between suppliers
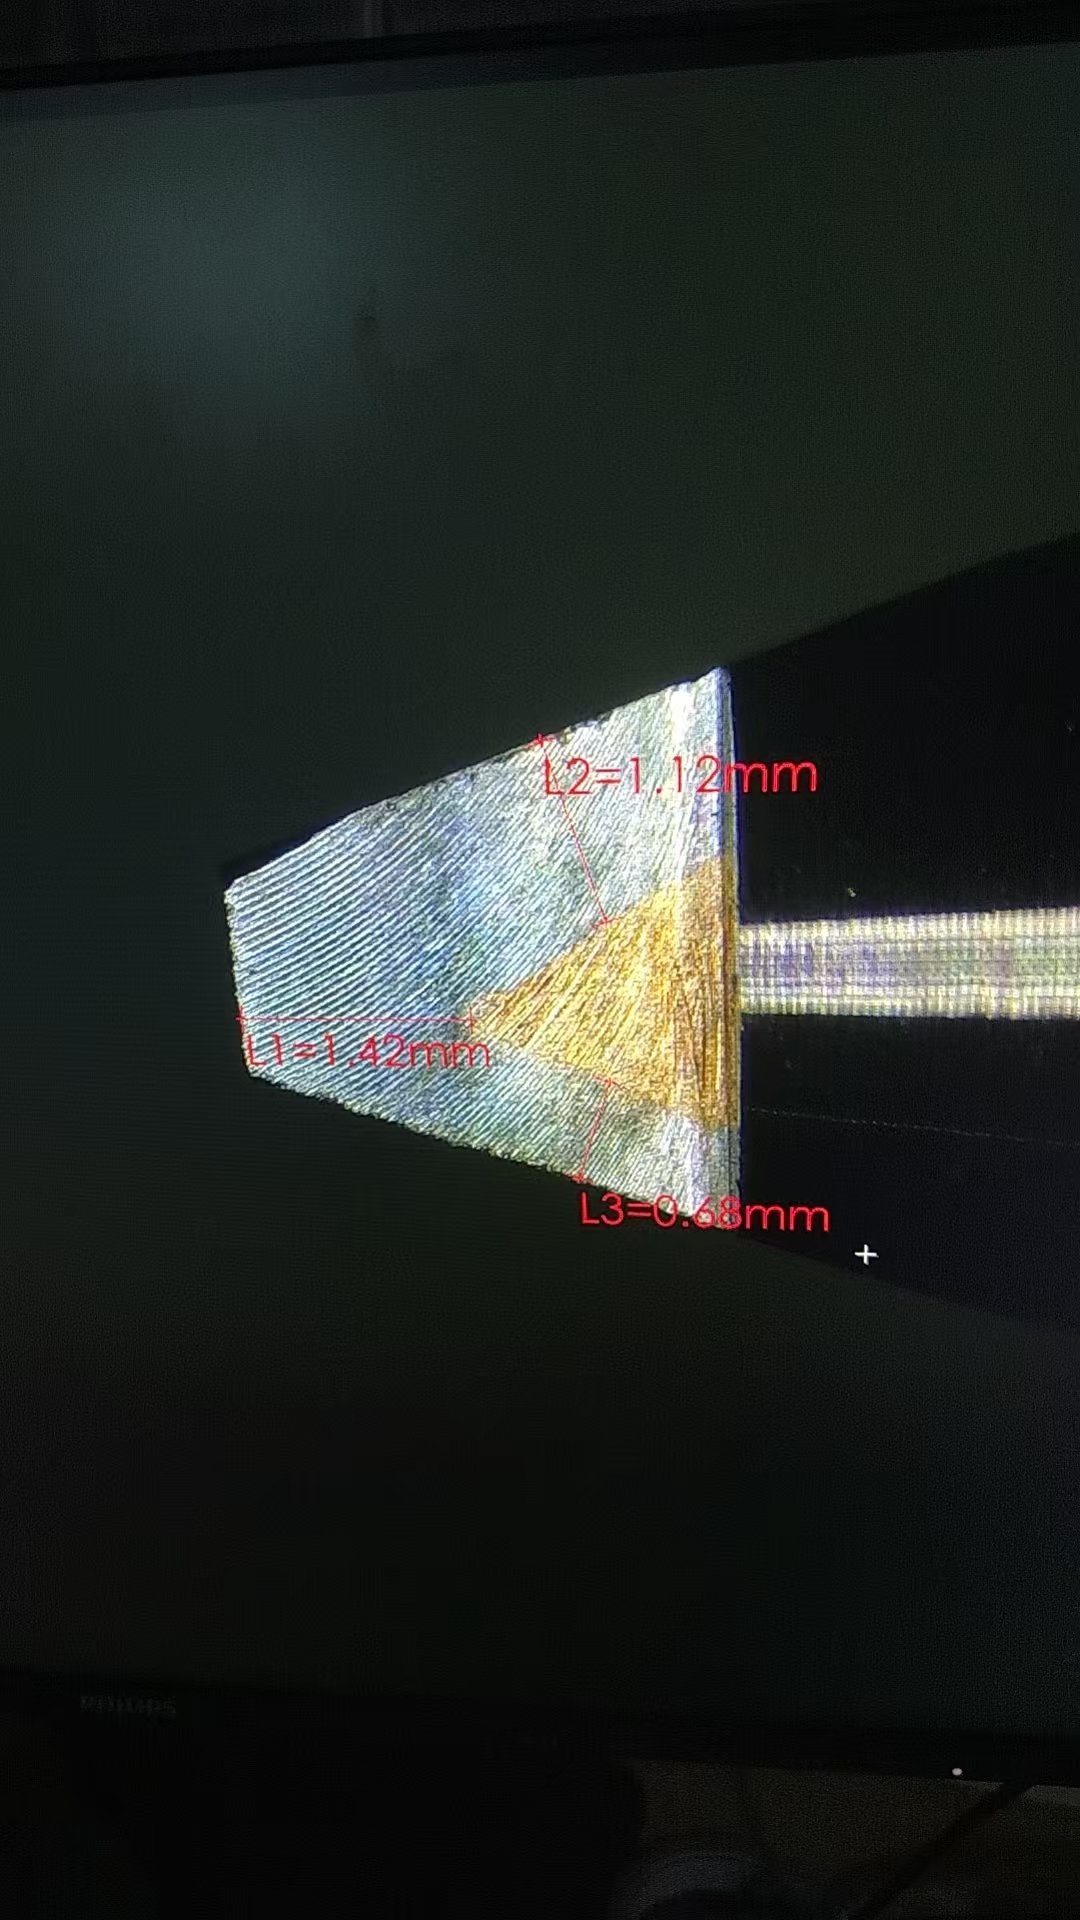
That last point is measurable and most buyers never check it. Cross-sections of production tips show iron layer thickness above 1.0 mm on the working face. Low-cost replacements frequently come in at half that or less, and the difference never appears on a spec sheet — it appears as tip life three weeks later.
If you are replacing tips more than once a quarter per station, it is worth knowing what the iron layer actually measures. Our guide to iron plating thickness in industrial soldering covers how to verify it and what ranges to specify.
FAQ
Can I use sandpaper to clean a black tip?
No. Sandpaper removes the iron layer along with the oxide. Every pass makes the tip thinner and shortens its life. Use brass wool.
Why does my tip turn black within minutes of cleaning?
Either the temperature is too high, or you are not re-tinning after cleaning. A clean tip at 350 °C with no solder on it will discolour within a couple of minutes.
Is a black tip always dead?
No. Most black tips are oxidized, not breached. Run the five-second test before you throw anything away.
Does tip activator damage tips?
Used occasionally, no. Used every shift, yes — it is a chloride salt and it accelerates corrosion of the iron layer.
How long should a tip last?
Under normal production conditions — 8 hours a day, 350 °C, tinned and cleaned properly — a good iron-layer tip should last several months of continuous use. If yours lasts weeks, the cause is usually operational or a thin iron layer, not the tip design.
Related reading: Compatible vs. original soldering tips · Why solder does not stick to a soldering tip · How to choose a soldering tip supplier